How To Test Continuity On Multimeter
How To Test Continuity On Multimeter - Here are the detailed steps for continuity testing using the multimeter in continuity mode: Understanding the role of a continuity tester in electrical diagnostics is crucial for professionals and enthusiasts alike. Measures the ability of a capacitor to store electrical charge. If your device shows 0.00 then your battery on the multimeter is in good condition. Look for a multimeter with a continuity testing function, typically indicated by a diode symbol or a beeper icon. Turn on the multimeter and set it to the diode testing mode. Red to the positive terminal and black to the negative terminal. Understanding the role of a continuity tester in electrical diagnostics is crucial for professionals and enthusiasts alike. Tests the continuity of a circuit path, often indicated by a beep. Turn off the power to the circuit or device you are testing. Continuity testing is a crucial step in electrical testing, as it helps to identify any faults or issues in a circuit. Watch as roman demonstrates why continuity (the “beep test”) is only designed for checking circuits that should be connected, like light switches and. Either using the continuity mode or the resistance mode. Testing continuity in a wire, current, or fuse is a good idea if you’re installing or repairing any electrical components in an outlet, fuse box, car, or appliance. Your multimeter should also be able to test ohm, which measures continuity versus resistance in a circuit. Red to the positive terminal and black to the negative terminal. Tests the forward voltage drop of a diode. Measures the rate of oscillation of an alternating current (ac) signal. It’s often indicated by a symbol resembling sound waves. Verify that switches are functioning correctly. Understanding the role of a continuity tester in electrical diagnostics is crucial for professionals and enthusiasts alike. Tests the continuity of a circuit path, often indicated by a beep. Select a digital multimeter that is suitable for the type of testing you need to perform. A quick and straightforward guide to test continuity with a multimeter!check an entire video on. Before you can start testing for continuity, you’ll need: This will prevent any potential damage to your multimeter or the circuit. Checking for continuity is an easy way to see if 2 ends of something are connected. To test continuity, all you have to do is stick 2 terminals on your multimeter against 2 ends of an electrical current. The. Select a digital multimeter that is suitable for the type of testing you need to perform. I start by setting my multimeter to the continuity symbol, like tuning an instrument. Red to the positive terminal and black to the negative terminal. Follow these steps for continuity function: Here’s a straightforward guide on how to perform a continuity test: Ensure that the circuit is safe and free from any obstacles that may interfere with the test. Verify that switches are functioning correctly. I start by setting my multimeter to the continuity symbol, like tuning an instrument. Here are the detailed steps for continuity testing using the multimeter in continuity mode: The steps for continuity test using continuity mode is. To test continuity, all you have to do is stick 2 terminals on your multimeter against 2 ends of an electrical current. A continuity test can tell you whether a fuse has blown and needs to be replaced. Testing for continuity is crucial because it helps: If your multimeter doesn’t have a diode mode, set it to the lowest resistance. When checking for continuity, a multimeter is precise, reliable, and easy to use, making it the preferred choice for many. I use a car fuse in. Before you can start testing for continuity, you’ll need: It’s often indicated by a symbol resembling sound waves. Turn off the power to the circuit or device you are testing. This setting is usually denoted by an audible beep symbol or the ohms symbol (ω). Tests the forward voltage drop of a diode. Ensure that components are connected properly within circuits. There are mainly two methods for checking the continuity of a circuit using a multimeter. Set the multimeter in the continuity mode. When checking for continuity, a multimeter is precise, reliable, and easy to use, making it the preferred choice for many. Set the multimeter to the continuity mode: A quick and straightforward guide to test continuity with a multimeter!check an entire video on multimeter basics here: Either using the continuity mode or the resistance mode. Measures the rate of oscillation of. This will prevent any potential damage to your multimeter or the circuit. Verify that switches are functioning correctly. Either using the continuity mode or the resistance mode. A quick and straightforward guide to test continuity with a multimeter!check an entire video on multimeter basics here: Continuity testing is a crucial step in electrical testing, as it helps to identify any. If your device shows 0.00 then your battery on the multimeter is in good condition. Understanding the role of a continuity tester in electrical diagnostics is crucial for professionals and enthusiasts alike. Select a digital multimeter that is suitable for the type of testing you need to perform. Measures the ability of a capacitor to store electrical charge. Before performing. Follow these steps for continuity function: Watch as roman demonstrates why continuity (the “beep test”) is only designed for checking circuits that should be connected, like light switches and. A quick and straightforward guide to test continuity with a multimeter!check an entire video on multimeter basics here: The second method is to use the ohmmeter. Understanding the role of a continuity tester in electrical diagnostics is crucial for professionals and enthusiasts alike. For example, if you’re testing a. I use a car fuse in. Verify that switches are functioning correctly. Look for a multimeter with a continuity testing function, typically indicated by a diode symbol or a beeper icon. Every multimeter should be able to test voltage. Here’s a straightforward guide on how to perform a continuity test: This setting is usually denoted by an audible beep symbol or the ohms symbol (ω). Select the continuity setting on the multimeter. Checking for continuity is an easy way to see if 2 ends of something are connected. A continuity test can tell you whether a fuse has blown and needs to be replaced. Your multimeter should also be able to test ohm, which measures continuity versus resistance in a circuit.
How to Use a Multimeter SparkFun Learn

What is Continuity in Electricity How to Test Continuity with Multimeter

Testing Continuity with a Multimeter Chibitronics

Multimeter Tutorial Learning about continuity
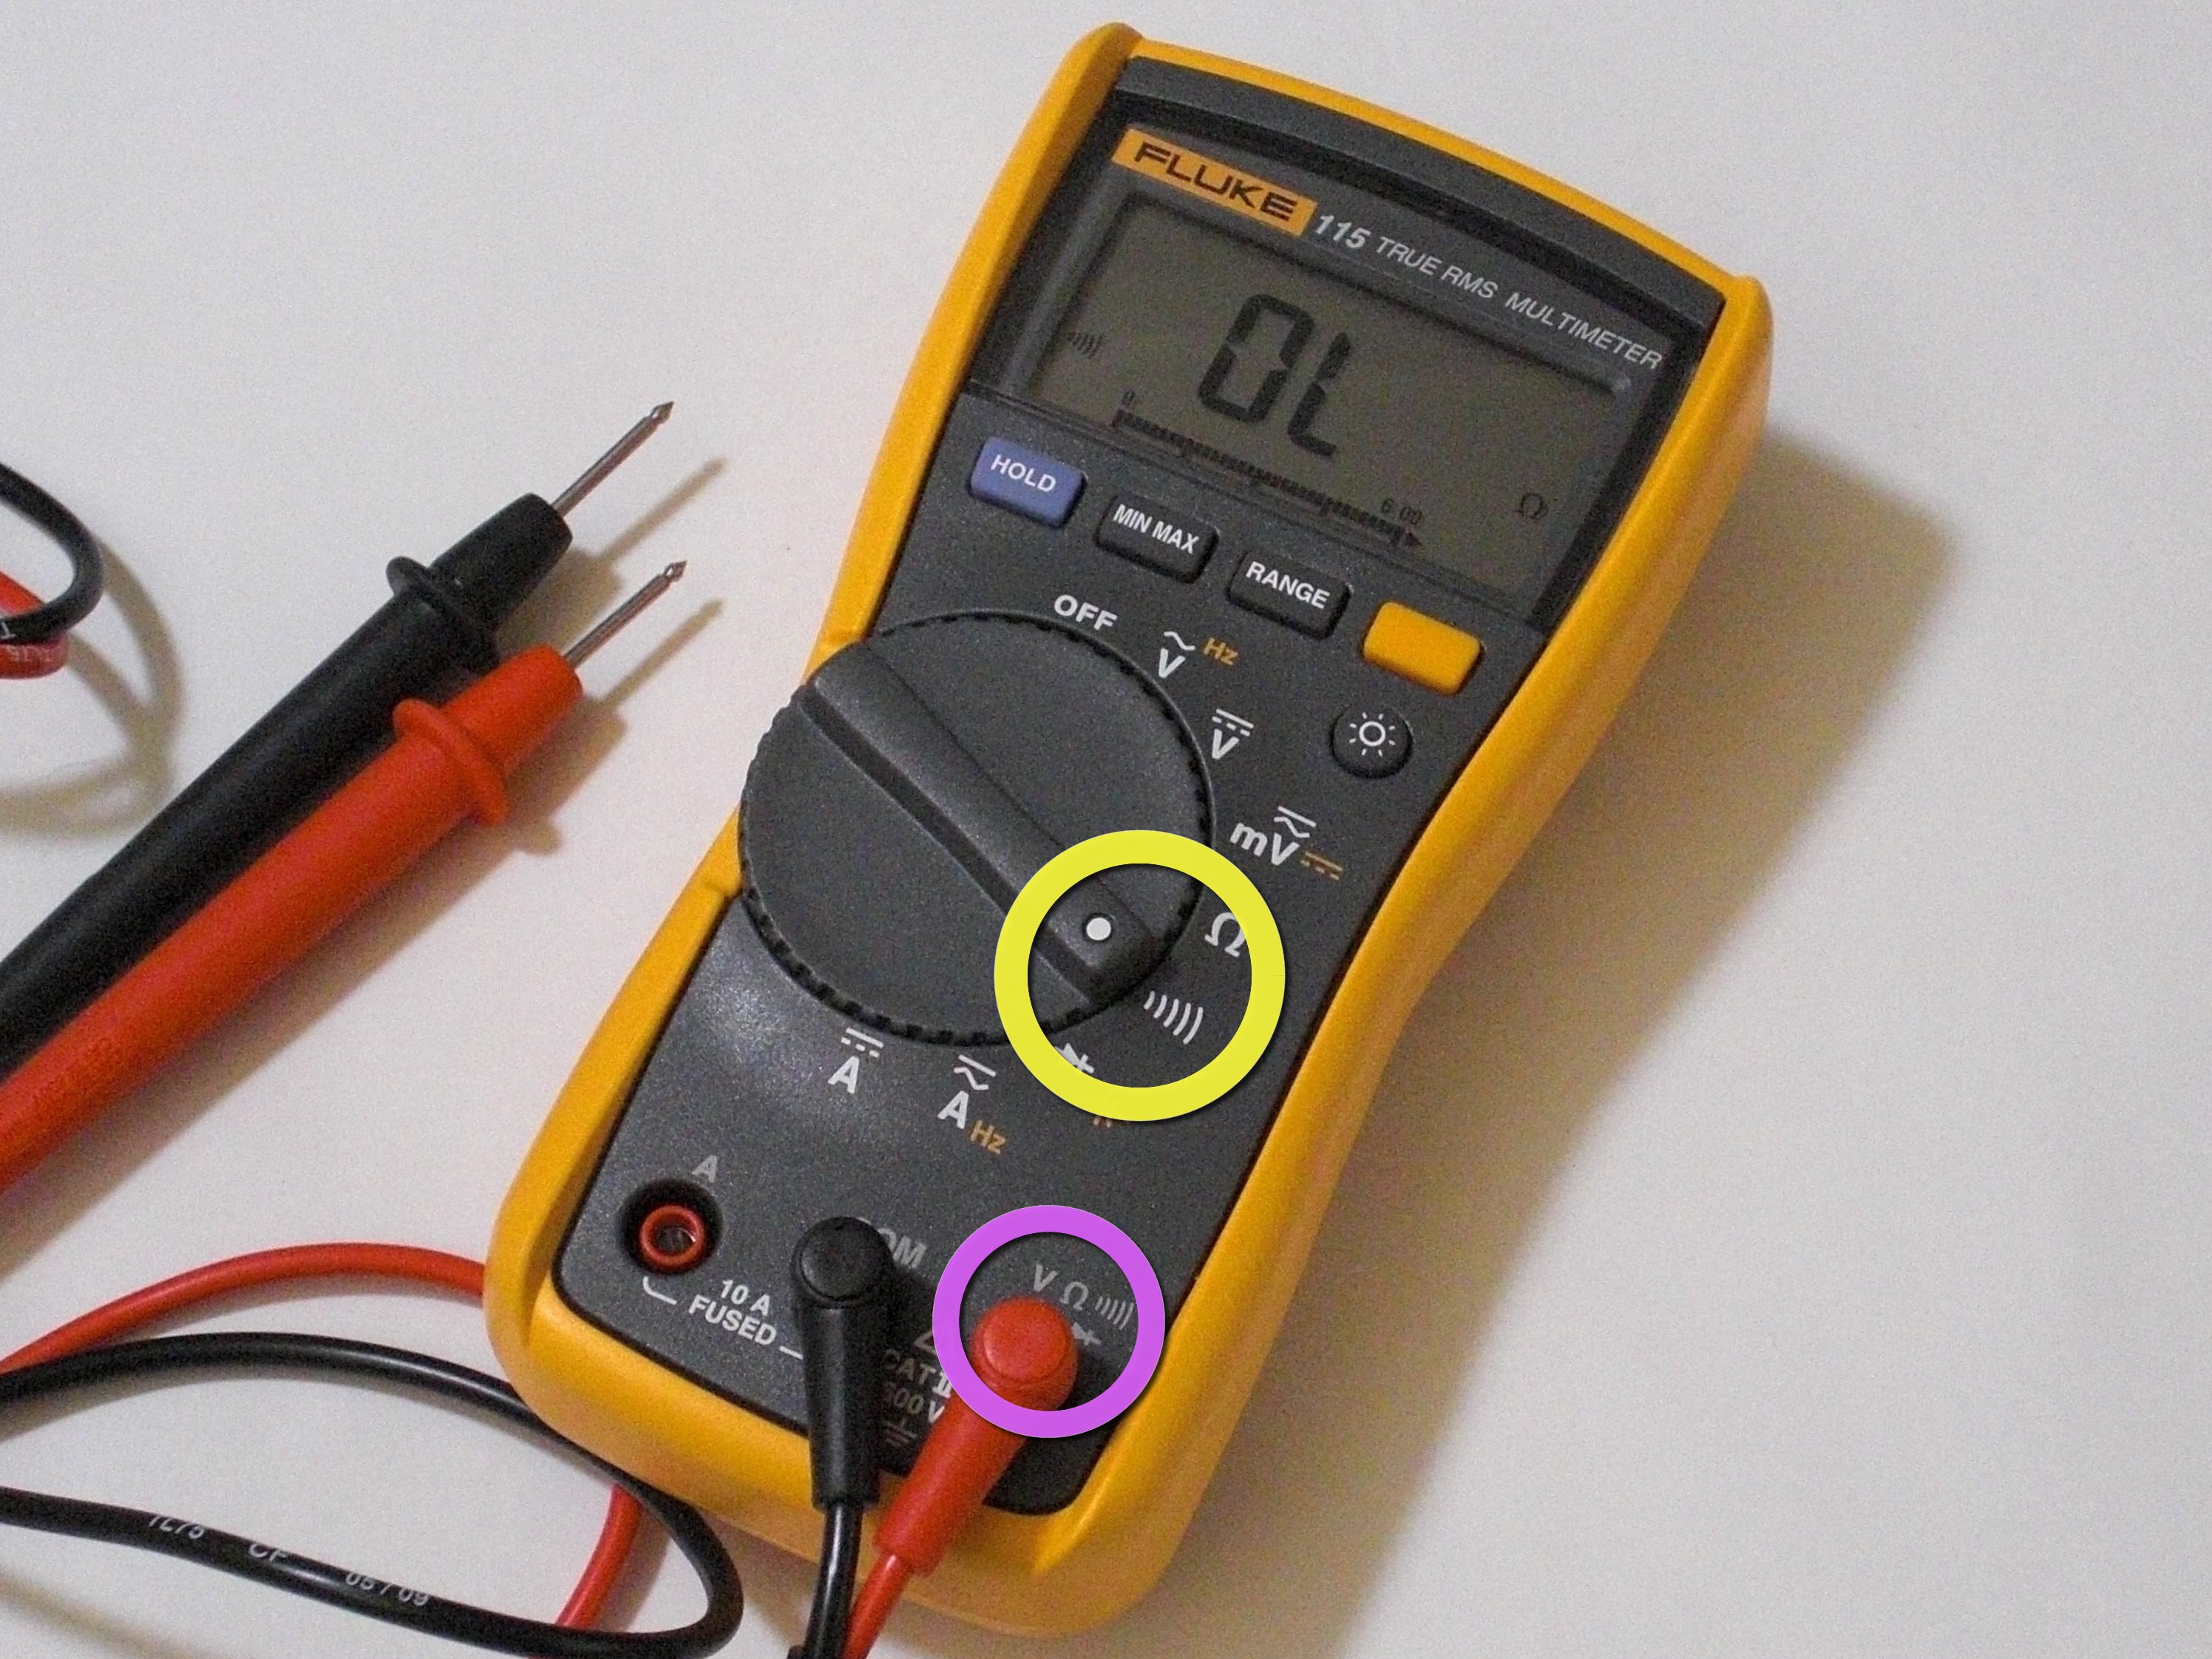
Testing Power Cord Continuity iFixit Repair Guide

How to Test Continuity with a Multimeter in 3 Simple Steps?

How To Perform a Continuity Test for Electric Components with Multimeter?

How To Perform a Continuity Test for Electric Components with Multimeter?

How to Test Continuity with Multimeter? YouTube

Testing Continuity with a Multimeter Chibitronics
Ensure That The Circuit Is Safe And Free From Any Obstacles That May Interfere With The Test.
I Start By Setting My Multimeter To The Continuity Symbol, Like Tuning An Instrument.
Ensure That Components Are Connected Properly Within Circuits.
To Test Continuity, All You Have To Do Is Stick 2 Terminals On Your Multimeter Against 2 Ends Of An Electrical Current.
Related Post: